Thursday, October 31, 2013

Toddler Earflap Hat

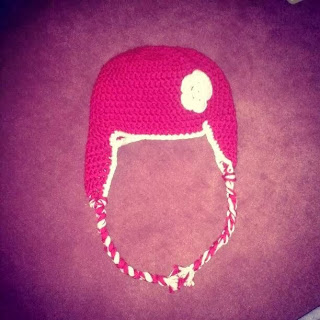
A fellow mom friend of mine emailed me asking if I could make her adorable little lady a new hat for this winter.  Her current hat no longer fits so she needs a new one.  So I looked to find the perfect pattern.  Well, I found one I like but it wasn't large enough so I ended up improvising my hat.


Below is the pattern I created to make this adorable earflap hat (this fits my 3.5 year old who's head circumference is about 20"). Yarn is worsted weight and crochet hook J:

1 - Magic Loop 11 dc, join with a slip stitch
2 - ch2, make 2 dc in each st, slip stitch to join (22 st)
3 - ch2, *2 dc, dc in next st* repeat around, slip stitch to join (33 st)
4 - ch2, *2 dc, dc in next 2 st* repeat around, slip stitch to join (44 st)
5 - ch2, *2 dc, dc in next 3 st* repeat around, slip stitch to join (55 st)
6 - ch2, *2 dc, dc in next 4 st* repeat around, slip stitch to join (66 st)
7 - ch2, *dc in each st around, slip stitch to join
8-17 - repeat row 7, (don't fasten off since you'll want to join the very last edging yarn here)

Earflaps:

Skip 10 stitches from back. Join same color yarn with slip stitch:
1 - ch1, hdc in same st, hdc in next 11 stitches, turn
2 - hdc in each, ch1, turn (12 st)
3 - hdc dec, hdc in next 8 st, hdc dec, ch1, turn (10 st)
4 - hdc in each, ch1 turn (10 st)
5 - hdc decrease, hdc in next 6 st, hdc dec, ch1, turn (8 st)
6 - hdc in each, ch1, turn (8 st)
7 - hdc dec, hdc in next 4 st, hdc dec, ch1, turn (6 st)
8 - hdc dec, hdc in next 2 st, hdc dec, ch1, turn (4 st)
9 - hdc dec, ch1, hdc dec, fasten off (2 st and 1 ch) (if you don't plan on making the braids, then leave out the ch1)

skip next 22 stitches.  Then repeat rows for second earflap.

Finishing:
Join second color in back and sc around the entire hat.  Next add braids.

Braids:

cut 8 - 15" pink and 5 - 15" white pieces of yarn.  Fold in half and attach to earflap ch stitch hole like a tassel.  Separate yarn pieces into 3 strands and braid.  Tie off with your choice yarn.  Cut leftover yarn to preference.

My little 'Nut modeling the newest hat
Measurements:
From top to forehead - 8"
From top to base of earflap - 11"
Tuesday, January 1, 2013

New Year's Resolutions

It's that wonderful time of year again.  It's that time that we want to better ourselves because it's a new year, a new beginning if you will.  My resolutions in terms of Brotz Creations as a business are as follows:

1.) Get my Etsy shop back up to running and keep it up-to-date.  That also means doing a lot of marketing to get the etsy shop running.  If I find I cannot get too much business on etsy, I may look into getting my own website.  But that truly depends on how sales go!

2.) Make more hats than just the custom orders so that I'll be able to get more out in a more timely fashion.  I think I can manage about 3 a week.  I'd love to have a wide variety of hats for any vending times over the summer!

3.) Use primarily local yarns/stores.  I typically use The Knitter's Edge for all my yarn pleasure!  I believe it's the largest in the state as far as a local yarn store (LYS) is concerned.  Seriously, the first time I went there (on opening weekend) it took me over 2 hours to go up and down the aisles because of how much beautiful yarn they have!  Peanut and Bean now love to run around that store so much and constantly ask when we're going to the yarn store.  
I also love the other local textile company, Kraemer Yarns over in Nazareth, who makes their own yarn in shop.  When I first started really becoming a yarn snob back in 2006/2007, we didn't have a lot of big craft stores around (or at least I didn't know the area well enough) and I avoided Walmart like the plague.  This is located in my hubby's hometown, so when I'd go visit him, I'd stop in and pick up a skein or two! 

4.) Attempt to do at least 4 craft shows this year.  It's tricky because of the little kiddos but I think it may be doable.  Just need to have the right connections (thank you hubby)!

5.) Miscellaneous items, like getting an official logo, updating the blog more often, making a few patterns here and there.

I think these are all manageable goals for 2013.  I would love to be able to have Brotz Creations as a full time job!  For right now, it's more a hobby.  Maybe in a year or two!

Sunday, December 30, 2012

Post Christmas Whirlwind

Whew, what just happened?!?!  Where did Christmas go?  How did it become the end of the year so fast?!

I was busy making tons of Tractor Hats.  Who knew they would be so ridiculously popular?  I was able to make them by modifying Shilo Horsman's Tractor Applique.  You can see the blog here!  I actually crochet the tractor onto the hat because I detest having to sew parts on/together after I'm complete.  It's kind of like second sock syndrome...

Here are some of the newest tractor hats I've made.  All are in toddler size (2T - 19").

Yellow and Gray Tractor Hats
Navy Blue Tractor Hat

And a few new Flapper hats!  I still plan on putting a bright orange flower on the brown one!  Should be ready to mail by Monday  :)  These were all made with Plymouth Yarn's variations of Baby Alpaca Grande.  It's a super soft alpaca yarn.  Definitely a hand wash/dry purchase though.

My frustration with getting a shot wearing the hat showing!
Red Grande Glow Baby Alpaca Hat
Chestnut Baby Alpaca Grande Hat

And my project that I was able to finish just in time for Christmas, the Bean's Christmas Stocking!  I worked on this and the Peanut's stocking last year but only completed Peanut's Mickey Stocking.  I was thrilled to finally get this finished.


Wednesday, October 24, 2012

Bean's Dress for the Wedding

I have been working on some custom school hats but last weekend was my sister-in-law's wedding.  I worked on Bean's dress for 2 days last week and put those hats on pause (and have resumed on Monday).  I posted this on my personal blog as well, but thought I should let y'all know what I've been up to!

For the wedding, I wanted Bean to match the rest of us in the family who were in it.  I looked everywhere online for the perfect dress.  I had thought I found one but once it arrived the Tuesday before the wedding, I noticed it was way too light of a purple to match the rest of us even remotely.

Here's a shot of the dress.  The sandal in front was the color of my dress and the sash for Peanut's Flowergirl dress.
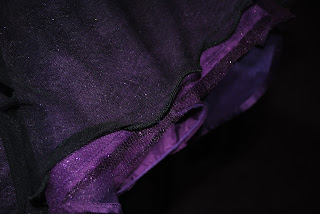
So I had a thought...  (which is never a good thing). I figured I could put some black tulle around the skirt and do something fancy with the top to 'darken' the purple shade.  So out came the seam ripper.  I pulled out the hem between the bodice and the skirt but left it stitched together on the inside.  I measured two pieces of tulle for the front and back portions of the skirt and sewed the sides together.  The fabric I had purchased already had a sewn edge that I used for the bottom.  Once the sides were sewn, I attached the top to the skirt piece and rehemmed the line around, making sure not to stitch over where the button flap went.  I also cut around where the dress opened on the back so that we could get it over Bean's head.

Here's the dress with the black tulle around the skirt (photo taken on my phone which is why the color is off)

I was stuck for a bit attempting to figure out what to do with the dress top.  I knew I'd attach a new ribbon around the bottom of the bodice but aside from that, I was lost.  I posted on my FaceBook and had several friends reply.  I wanted to make a puff sleeve out of the tulle, and even got so far as to make the full template.  Unfortunately, I didn't have enough time to complete the sleeves and get a decent night's sleep.

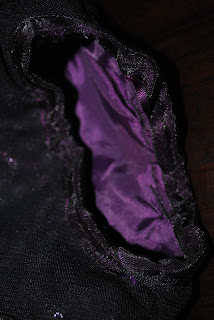
Instead, I doubled up the tulle and wrapped it around the top, sewing it over the ribbon and around the neckline and arm holes.  I made sure to pin everything down and still 'cut corners' so I ran out of some fabric on the back.  Luckily it was on the part that would be covered by the button.  After I sewed the tulle, I grabbed some ribbon.  The purple I had found wasn't the right color so I managed to have some sheer black and overlaid it.  The color was perfect, but now it meant I needed to sew two ribbons on.  Sigh, I am a glutton for punishment it seems!

Here's the two different ribbon colors.  See how the black makes the purple slightly darker?

I started by sewing the ribbon along the backing where the top came together.  Then, I sewed the ribbon around the middle, between the bodice and the skirt.  Next, I sewed around the neck line, and finally, sewed the arm holes.  That was the trickiest part, since the arms were too small to have the fabric go around the sewing machine!  But I loved the outcome and received numerous compliments.  I was even impressed that I managed to make it so cute (not to toot my own horn too loud)!

Bodice

Ribbon along the bodice/skirt line

Arm hole

Neckline

Back button (see where I missed the tulle overlay?  oops)

The bottom of the skirt

Overall dress

Saturday, October 13, 2012

Little Lady Bug Hat

My friend's daughter has her 2 year birthday party!  For her birthday, I wanted to make her a hat, either an owl or ladybug since that's what she loves.  However, with my other orders, I was afraid I wasn't going to get it made in time.  But I decided to go ahead and try starting Friday afternoon.  The party was today (Saturday).  I actually was able to complete the hat portion last night as well as whipping up all the 'spots'.  I sewed on 4 spots last night, but was too exhausted to finish, so I completed them this morning.  Hooray for kiddos waking at 6?!?!

I found the Ladybug Hat Pattern for free on Crochet Every Day's blog (I think I might need to follow this blog!) and decided to go to work.  Since the recipient is 2, I decided to up my crochet hook to a K size (6.50mm) and added a row of black {R5: ch2, *3 dc, 2dc in each dc* [rep 12 times] (60 dc)}.  Instead of 13 rounds, I made 5 rounds of black and then 11 rounds of red, in addition to the last shell row for a total of 17 rounds.  I also created 10 'spots' to place around the entire hat, and decided against putting the center seam and antennas on.

Here's Peanut modeling the newly done Ladybug Hat

A view from the back (these colors are the correct shades)

Up close shot of the 'spots'

Thursday, October 11, 2012

Andy the Android

A friend of my hubby keeps seeing the "little guy" he's got on his desk at work.  So, he requested one as well.  It's made of Sugar & Cream yarn.  After I completed it in a day, hubby stated it didn't look like the one I made him.  Hmm...  That's not too surprising considering the one I made hubby was my very first crochet project.  I've learned how to correctly do the stitches now, but since the one he saw was the one I made my hubby, I'm in the process of making another one.  So if anyone wants to purchase a Droid guy, let me know.  He's $20 plus shipping unless you're local, then I can get it to you.


This is the pattern I followed for him!  Check it out if you crochet and want to make one of your own!

Wednesday, October 10, 2012

Baby Flapper Hats

I had a request for some cute newborn hats and a toddler hat.  I searched ravelry for another super cute free pattern. I found AnnaVirginia Fashion's Baby Girl-Flapper Hat *Pattern*.  Instead of using a ribbon, I decided to crochet flowers on each.  I used Vanna's Choice Baby Yarn in white and was able to easily follow the newborn pattern and the toddler hat.  Here are photos!

Bean modeling the toddler hat and holding her baby doll modeling the newborn size
The three hats with their flowers
Up close of the cute flower!
The newborn hats are $13.50 and the toddler size is $18.00